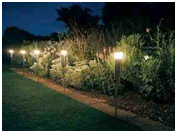
DIY (Do It Yourself) Guide – Installing Low Voltage Lighting
Comprehensive guide for Installing Low-Voltage Garden Lighting

Steps for installing low-voltage lighting
The basic principle of low-voltage lighting is the transformation of high voltage 110/120 volts to low voltage 12 volts with the use of a transformer. The initial step for installing low voltage lighting is to consider the layout where each fixture is going to be placed. As noted; when installing such lighting outdoors, often the main purpose could be aesthetic or you may want to illuminate a pathway. A good layout will not obstruct. Often patio lights are subtle with different moods and effect and do not produce any glares that can be annoying. You would also want the lights to be visible and not hidden behind a tree or blocked by something else.
There are different layout possibilities. The most simple of layout is to place fixtures such that they form a single line. In such instance, a transformer is connected at the end of the line. Layout possibilities include the split formation which splits the cable in two or many parts of the recommended length and is attached to a transformer. You also have the “T” formation which offers equal distribution of voltage at the centre of the run. The figures show different types of layout possibilities. For the layout, the closer to a transformer a fixture is, the higher it wattage. Those further away have lower wattage it is therefore necessary to use the correct length of cable so that the wattage can be spread. A cable that is too long or more than the recommended number of fixture will have noticeable voltage failure. The lights further away will be dim. To fix such problem, you need to have the appropriate number
of fixtures for the recommended length. You can also use a multi-tap transformer or multiple transformers. Other possibilities include reducing the number of lamps on a cable or reducing the wattage of each individual lamp.
2) The cable length
Once you have decided where you would like to place the fixtures and how, you will have a good idea of how many fixtures you may require and an appropriate length of cable. Remember that the length of the cable must also include the run to the transformer. For landscaping, a 12 gauge cable is often ideal. Measuring the total length can be done with a measuring rod. You should add an extra 10% of the total length for any circumstances.
As you choose the cable you also need to calculate the voltage drop which will determine how many fixtures can be placed on a cable of a certain length. To determine the voltage drop, you will have to multiply the total wattage of the fixtures that are going to be placed on that cable to the cable length and divide
that with the cable constant. A cable having a gauge of 12 volts has a constant of 7500 therefore you will have [(cable length x total watts of fixtures) / cable constant)]. Aim to have 100 watt for 100 feet of cable meaning that; for 100 feet of cable, place light fixtures with the total combined wattage to be 100 watt. You can also obtain further information where you purchase the cable as it will depend on the cable capacity but for a cable having a gauge of 12V; a total wattage of 100 for 100 feet is ideal.
3) Choosing the transformer
The transformer helps in the conversion of the 120 V standard electrical current that is used to power many appliances in the home to 12 V. when choosing a transformer, the total wattage of the fixtures should be considered. For example; if you are planning on placing ten lamps and each lamps having wattage of 24 watts, your transformer should have an output power of at least 240 VA (24x 10).
4) Installing the cable with light fixtures
When you have determined where you want to place the fixtures, the appropriate design, the cable length required and obtained the transformer, you are ready to install. The installation will be done according to one of the configurations indicated. Use multiple transformers if necessary. The transformer has to be plugged to an AC power socket. If using a configuration with two or more transformer, make sure that their voltage is similar.
Start by placing a flag at each location where a fixture will be placed. Depending on the configuration, choose a central location for the transformer so that if you have multiple cables linked to a single transformer that they are of same length. Dig trenches according to the layout. The trench does not need to be deep but should be deep enough so that it is not uncovered easily. 3 to 5 inches should be enough. If necessary place the cable inside a plastic tube to protect against any pressure or prevent it for becoming wet during rain or when the soil is wet. Connect the end of the cable to the transformer and run the cable in the trench to each fixture and connect according to instructions. The fixtures that you use may come in many different shape and size. The majority will have a stake that can be planted to the ground. You can either use a broomstick or something similar to make an adequate hole where the lamb will stand depending on the type of fixture that you have. Many will also have adequate instruction has to fixing the fixture in place. Once you have 
Low-voltage lighting is a fantastic landscaping idea and adds aesthetic to a garden or other areas of the patio. It is also fantastic for illuminating pathways. There usage is not only limited to the outdoors and can also be used indoors for illuminating rooms with low voltage lamps. It can be very good for saving on energy cost.

