
DIY (Do It Yourself) Guide – Building A Raised Garden Bed
Garden Landscaping Ideas – Building a Raised Garden
Raised garden are built for three main reasons. The first reason is much more obvious; it’s a design style that can add character to a garden offering astonishing beauty at times. The second reason could be much more for protecting the garden if you kids that play a lot in the yard or need to define the space so that the plants may grow and not risk being damaged accidentally. The third reason may be to save you from having to deal with a poor quality soil. A raised garden can give you total control on the type of soil, its composition. A raised garden bed has also some other advantages such as better exposure to the sun, keeping away weeds, use of water efficiently, and of course it can be tailored to accommodate different plants. Building a raised garden can be performed in a number of method and with many different materials. Most frequently used material includes wood, stones and bricks.
Building a wooden raised garden
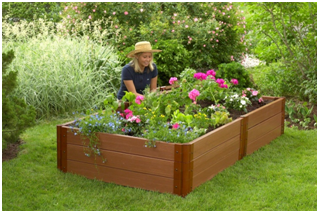
You can make just one big size wooden raised garden or several setting them in a manner to allow for walking space in between and according to your design preferences.
Using bricks to build a raised garden

The design can be simple or of any configuration that you desire. Much depends on the purpose of the garden. For instance, raised gardens are best for planting edibles which of course you would prefer a design that will comfortably give you access
to the whole garden. You may also just prefer to set the décor of the property looking for much stylish designs and configurations. To build a brick raised garden, start by marking the area where you would like the garden to be. Dig a trench ten eight cm deep. You may desire to clear the sod from the whole area or just make a trench. Make a mortar mix – it should be of 5 to one building sand and cement. Place the mortar mix gradually in the trench along the marked lines at least 5 cm of the mix and place the brick on top. Make sure that the brick is levelled. Have a string run from one end of the straight marked line to the other to be certain that you are placing bricks on a straight line. Place consecutive bricks along the stretch to complete a straight run making certain that they are levelled. When at a curve or angle, make the bricks follow the pattern always levelling accordingly. Remember; bricks are not flexible therefore any round design can only take shape depending on the length of the brick to make the contour of the circumference. As you finish making the bottom layer; start the next layer. The mortar mix is placed in between each bricks and at the bottom. The successive layers should not be perfect match in the sense that the end of one
brick should sit at the centre of the brick on the bottom. As you build, choose the desired height and have everything levelled accordingly. Once you have finished making the raised garden, you can apply a coating. This really depends on the type of bricks that have been used. Some bricks offer an aesthetic appeal and do not require a finish coating others may require that you apply plaster on both sides like butter. Use the mortar mix and smooth it inside and out like butter.
In the inside of your raised garden, place some newspapers or cardboard. This helps to kill anything that might have been growing in the area. Fill your garden with top soil or use compost. Plant accordingly any plants that you desire.
Raised Vegetable Garden Beds

Raised garden are a perfect solution for protecting your garden or when the type of soil that you have is not adequate for the plants that you desire to plant.
Online Garden Design offering unique landscape designs. Professional landscape designers – Landscape design packages and do it yourself landscape guides. Landscape designs/garden plans for garden makeovers, renovations or landscaping plans for new house builds. Online Garden Designs Australia wide including Sydney, Melbourne, Brisbane, Perth, Adelaide, Canberra, Darwin, Hobart